Food Minimum report enhanced with details
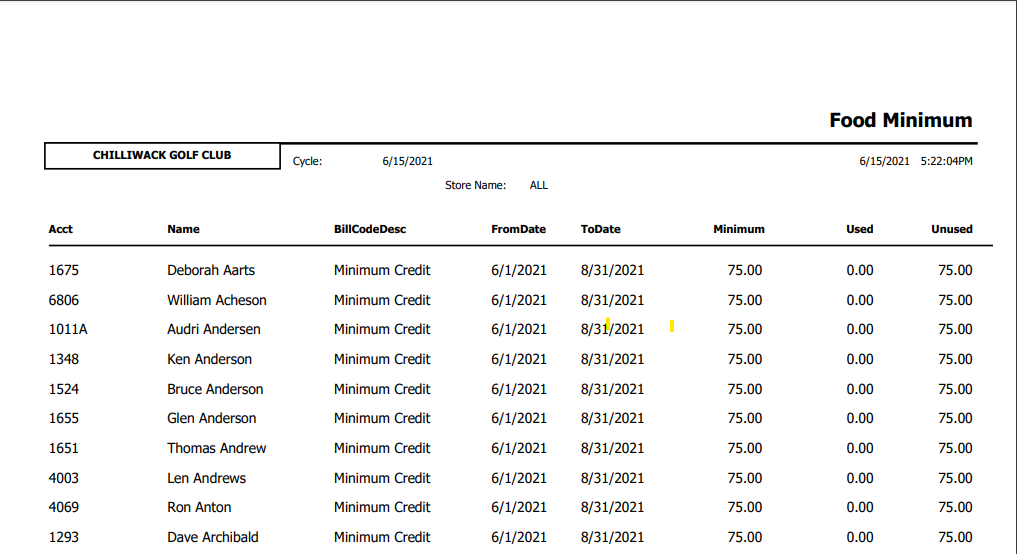
In 3.98, a new Food Minimum report was added to the CPS software, which contains the following details in columns: Customer Acct #, Customer first and last name, Food min item [BillCodeDesc] name of the billing code, [FromDate] the start date of food min cycle, [EndDate] the end date of food min cycle, [Minimum] food min, [Unused] food min remaining, and [Used] food min spent.
Shout out to Justin Morin @thepalisadescc.com
Example: You make a minimum for $50, and then a minimum credit for $50. Once you do that, you assign them both to the customer for monthly billing. When the customer comes in and buys items that count towards their minimum, the USED column will get a number, the UNUSED will decrease by the amount that was used. The MINIMUM column is just listing where the total will start at. Once a customer hits the $50 in our example, it stops there.
So in practice: You build and assign a $50 minimum and a minimum credit for $50 to a customer in Private Club Billing. You make a Sales category and call it BEER; minimum eligible so that all of the items in it count towards their minimum. Mr. Customer comes in and buys $10 in BEER in that month. When he gets his bill, he will end up paying $40 and not the full $50. It would keep going down until he hit the full $50 in BEER sales. On that report we would see this for Mr. Customer: ACCT number of their customer account, their name, BILLCODEDESC is the name that you gave the $50 Food Minimum in Private Club Billing (this is also what the customer will see on their monthly statement), FROMDATE is when that customer first started getting that Billing Code, TODATE is the last date that Billing Code was run for them, MINIMUM is the $50 that they started at, USED would be the $10 worth of BEER that they bought that month, and UNUSED would be the $40 they haven't spent yet. If that customer bought no more BEER in that month, the $40 is what they would pay on their bill at the end of the month.
To run the Food Minimum report
-
Go to Reports.
Are you running this report for the first time? If so click, yes>>
-
Select the time-frame tab under which you assigned the report: On Demand, Daily, Weekly, Monthly, Yearly. The reports listed under that tab display.
-
Select the Food Minimum report. The settings display to the right for you to update.
Note: The date range may be set based on the time-frame tab you selected in step 2 above.
-
Select the desired filters for this report.
-
Select Display or Print to run the report. For more details on this, click here>>
Report Example